Install Always On 2019 For Failover Clusters
Install Always On 2019 For Failover Clusters
Configure SQL Server
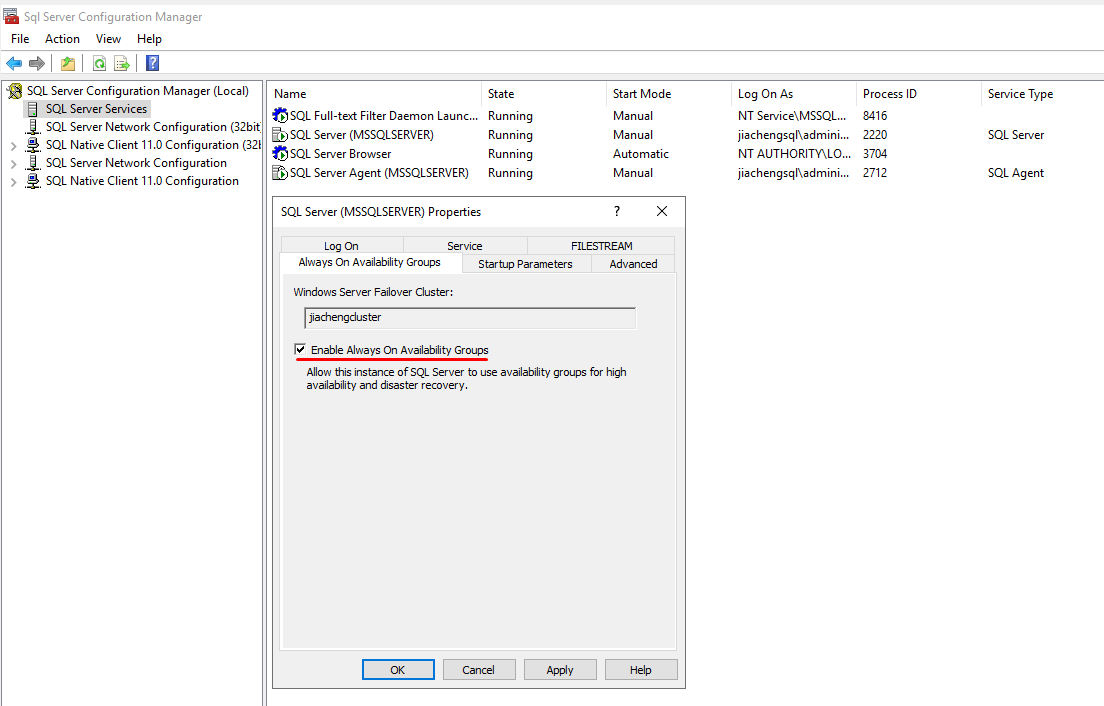
On each of the node servers (replica), turn on SQL Server Configuration Manager, SQL Server Services --> SQL Server (MSSQLSERVER) --> Properties --> Always on Availability Groups --> Enable Always on Availability Groups.
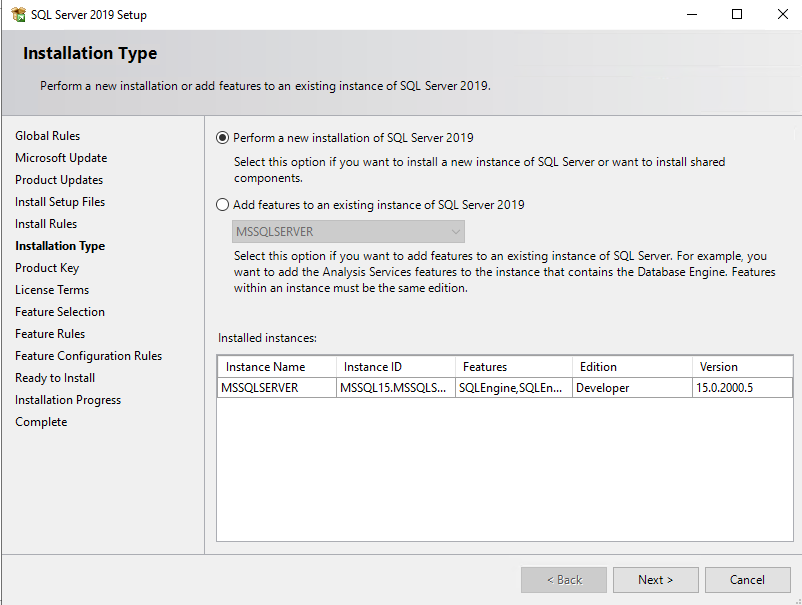
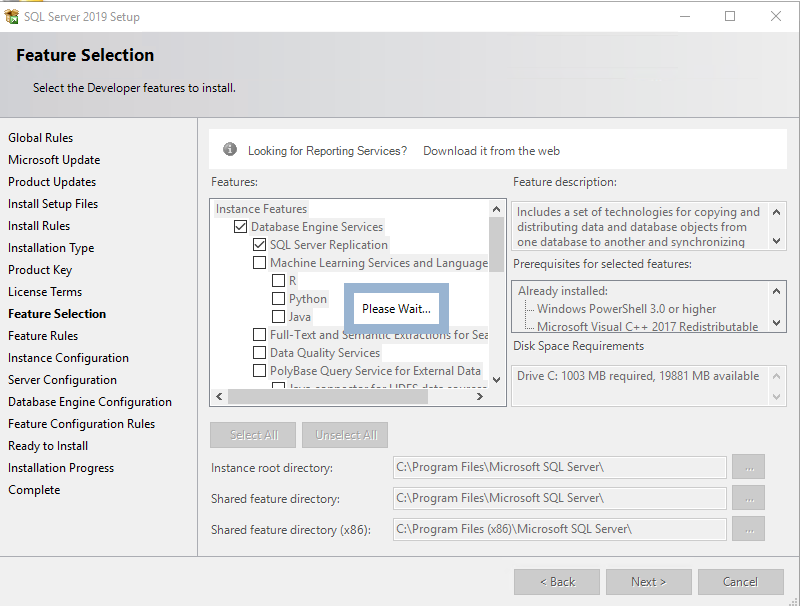
Then we install a stand-alone SQL service for the two node servers (replica).

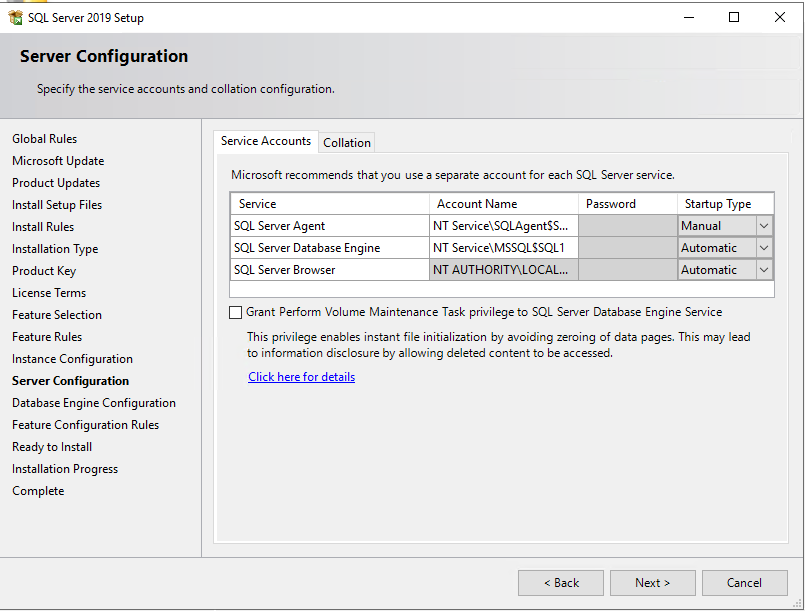
Also, we need to enable Always on Availability Groups service as we did before for the two stand-alone SQL services.

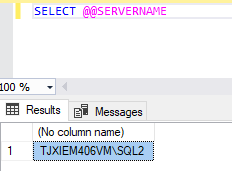
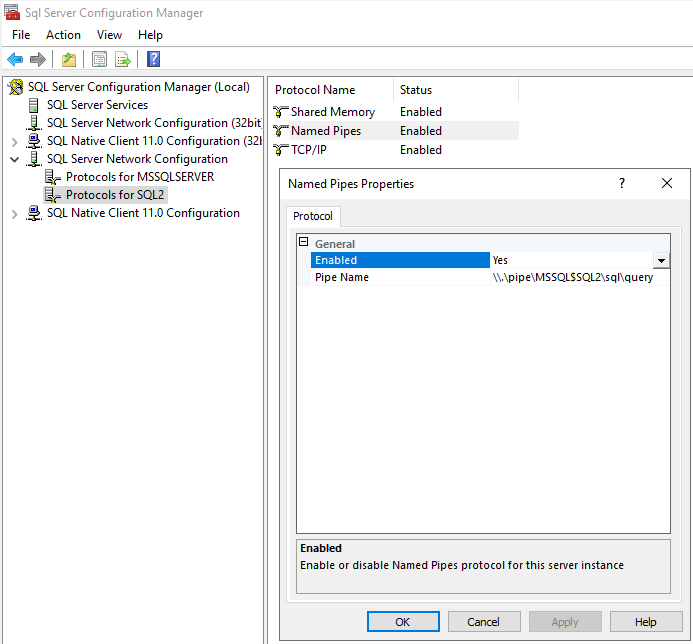
Moreover, for the secondary replica, we need to make sure its local
SQL service can be connected to the primary replica. In the SQL
Server Configuration Manager of the secondary replica,
SQL Server Network Configuration --> Protocols for SQL2
, enable Named Pipes and TCP/IP.
You need to restart the servers to make all the changes.
Restore and Backup Databases
If you have databases that need to be added to the AG, make sure that
they are in Full Recovery Mode and remove these
databases from any tlog backup maintenance. Here I need
to restore and back up AdventureWorks2019 database.
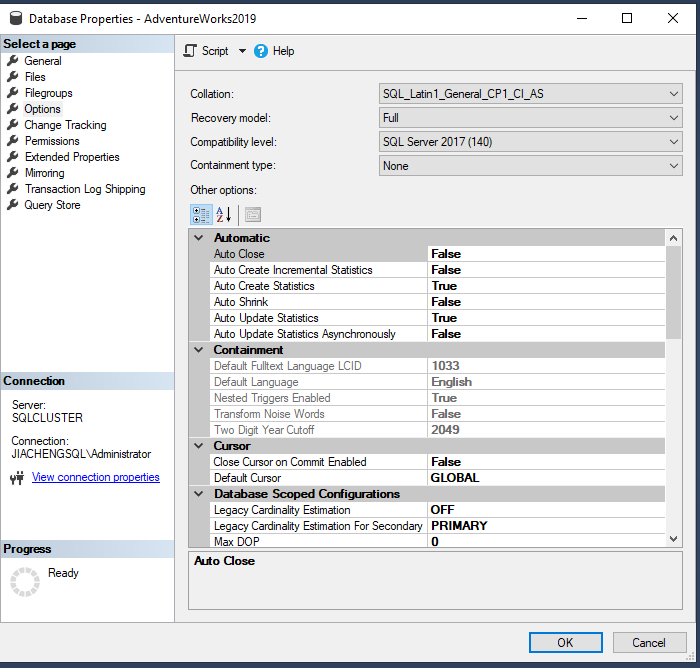
Restore the database on the primary replica, SQL 1.
Change the Recovery Model to Full.
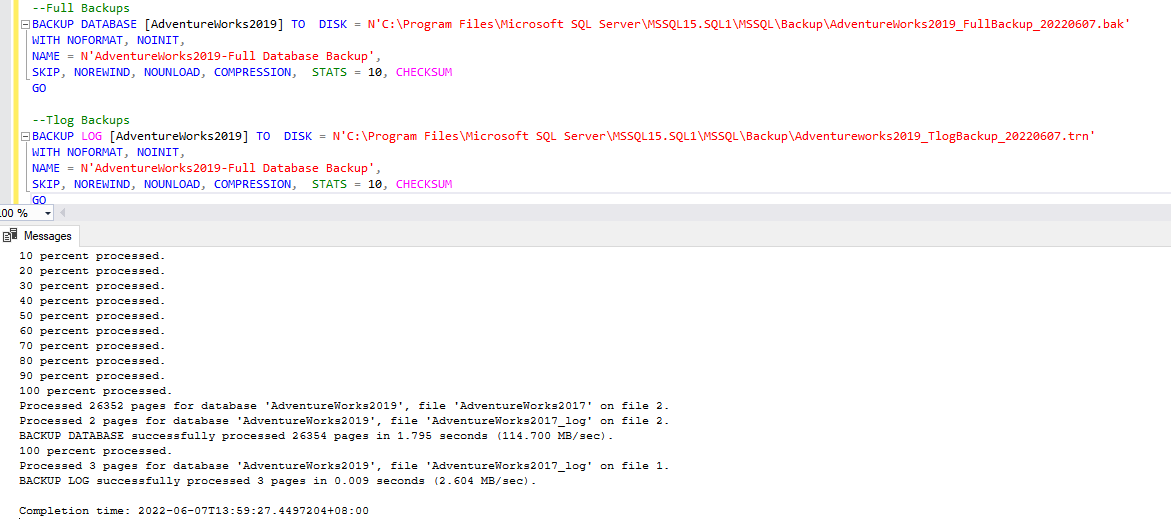
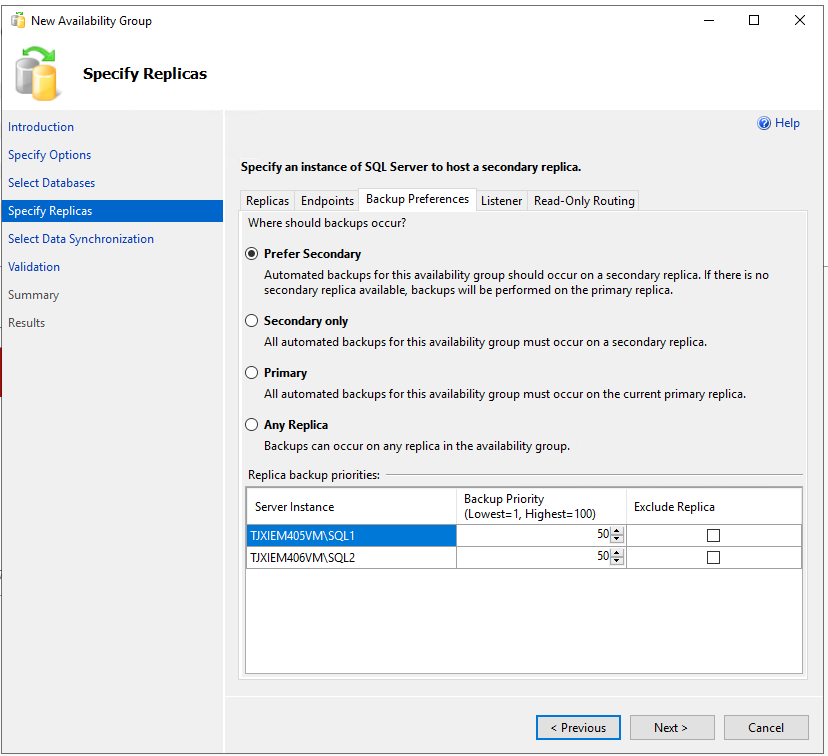
Take Full and tlog backups of all databases before adding them to AG.
1 | |
Install Always On
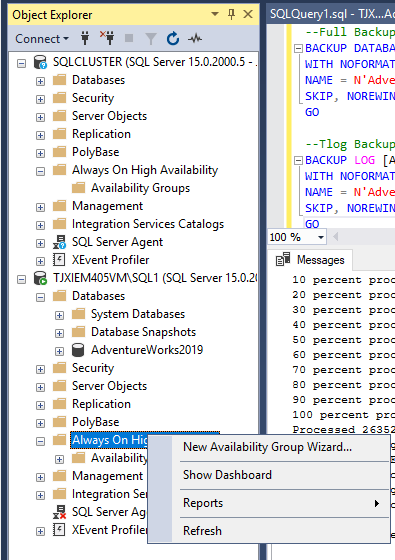
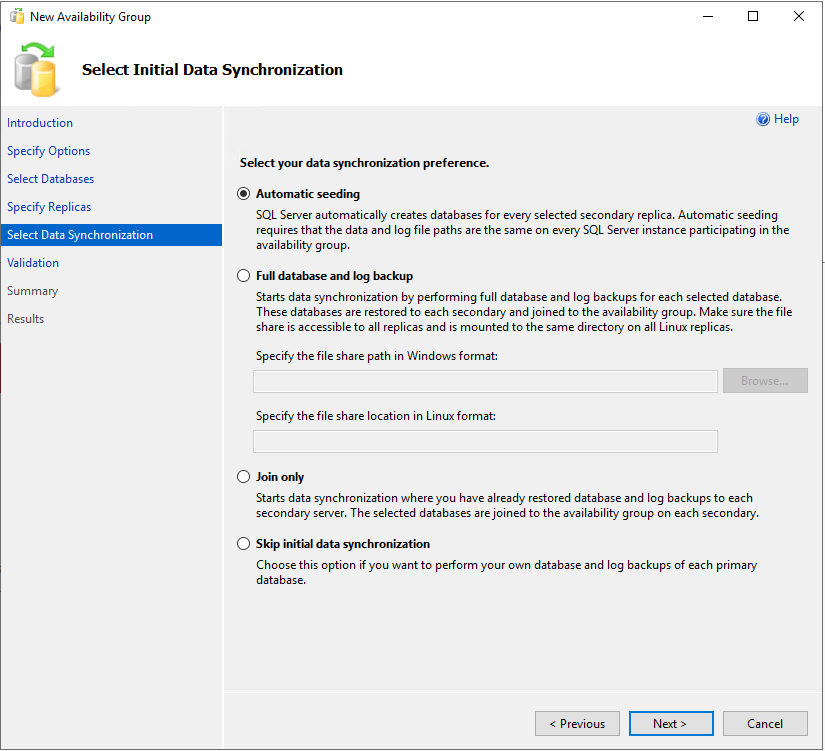
Connect to your primary replica, and start the New Availability Group Wizard.
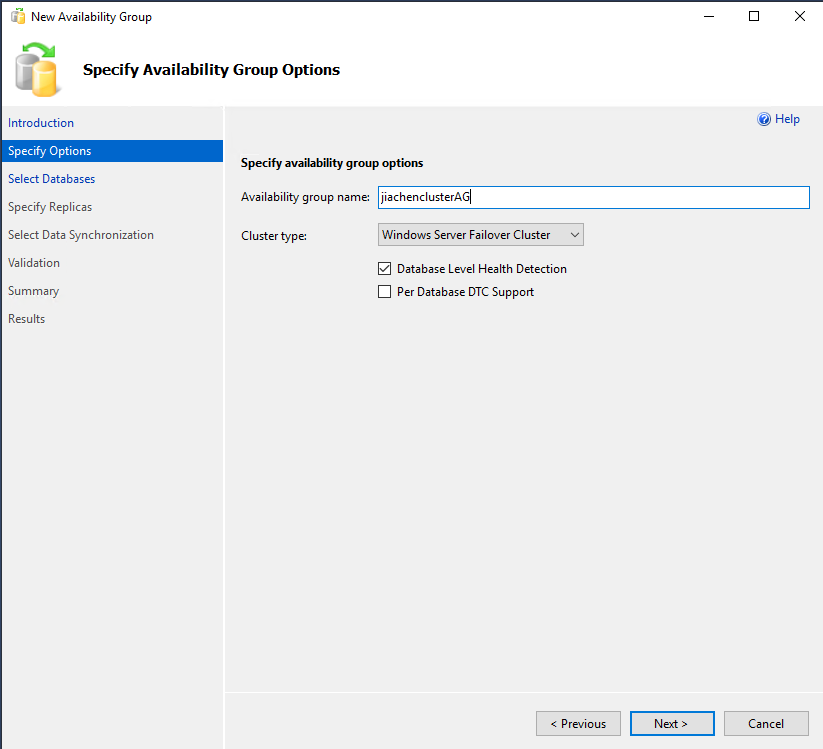
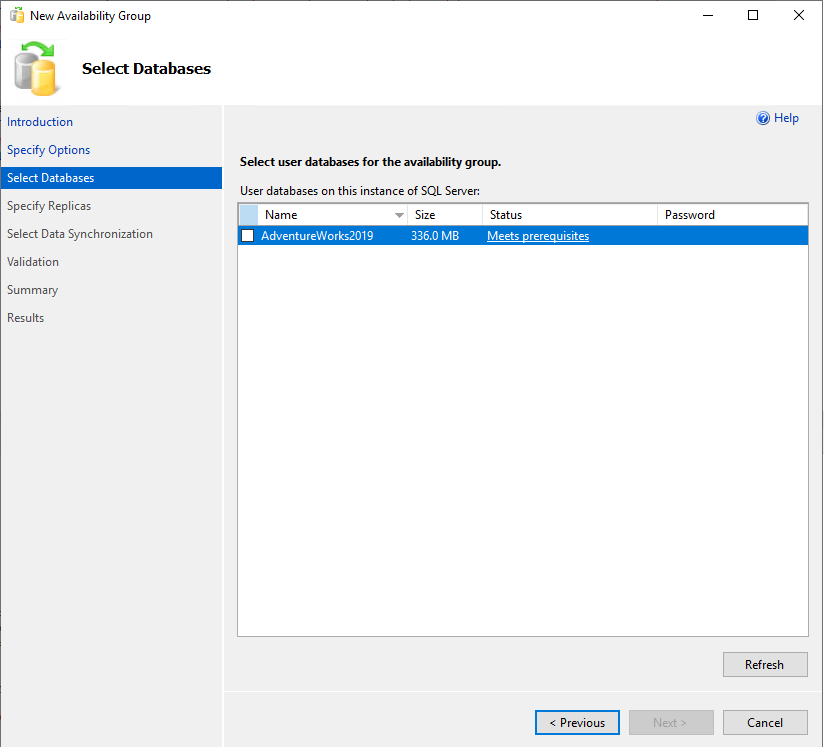
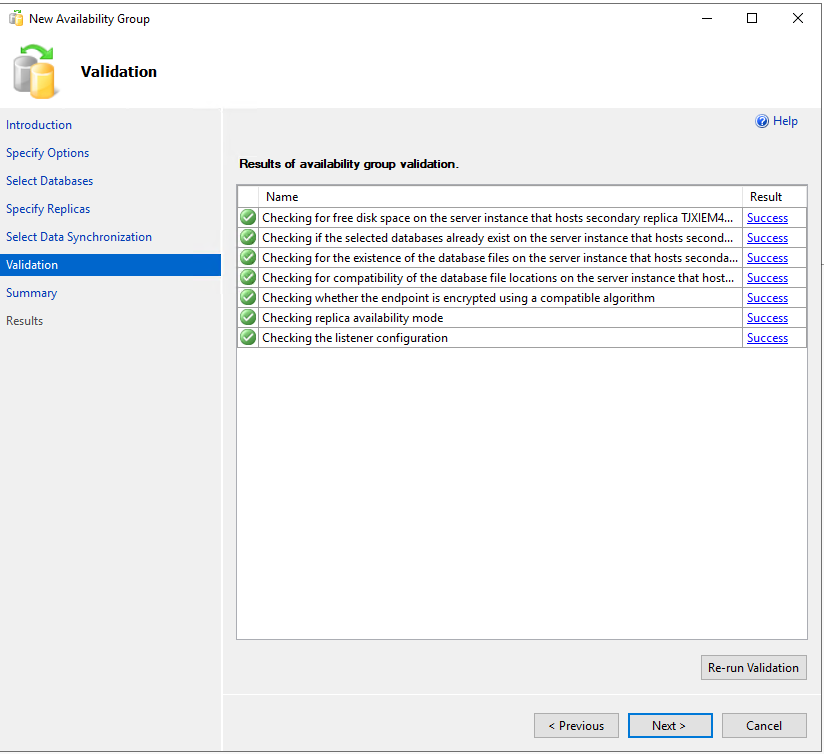
If the status of the database is not
Meets prerequisites, check detailed information.
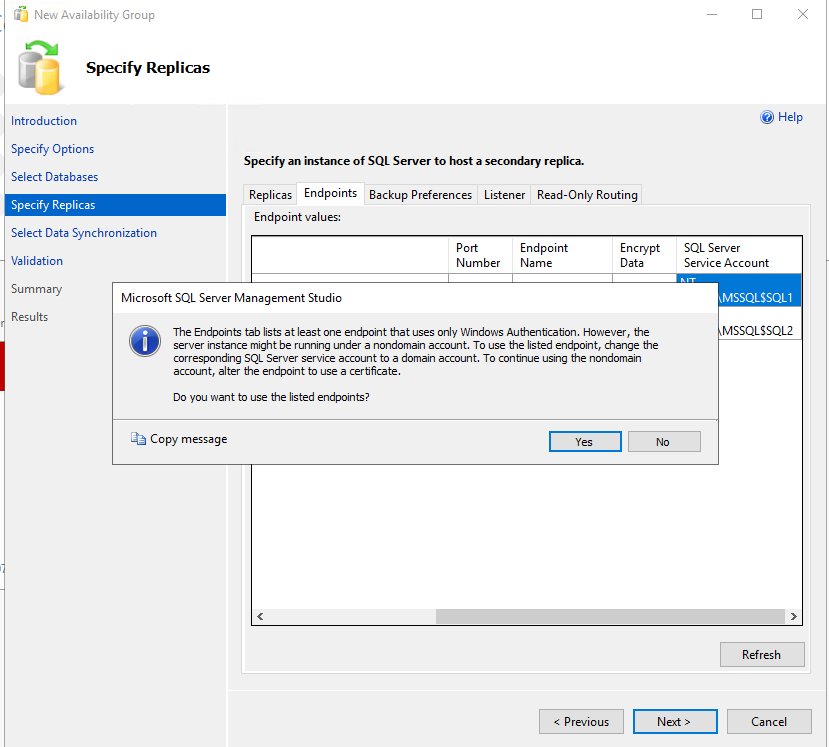
Add secondary replica.

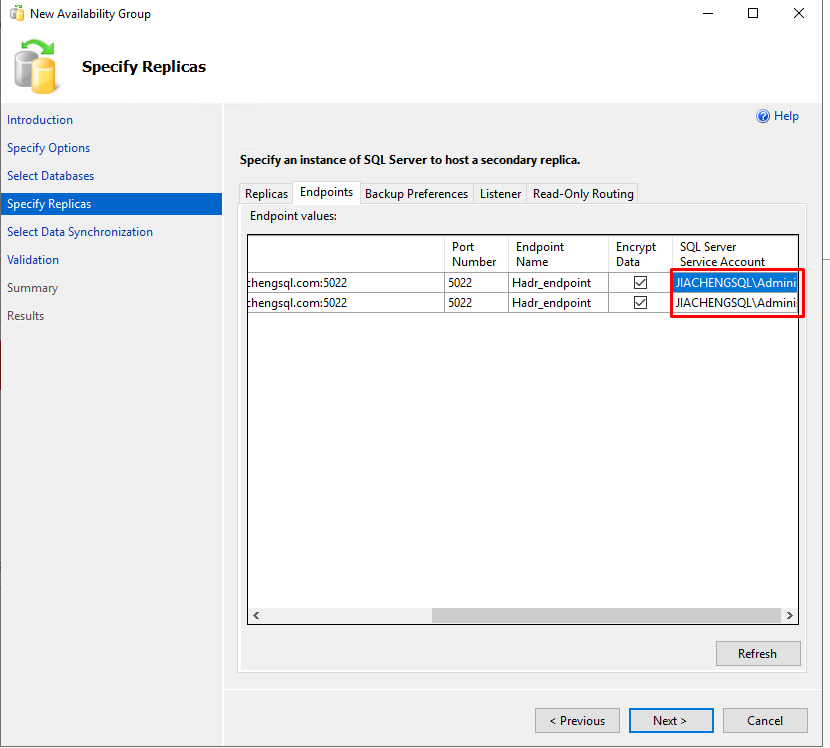
In the Endpoints tab, to avoid the following warning, we
need to set the SQL Server Service Account to the domain
account instead of the local server service account. Note that the
Port Number should be 5022
In the SQL Service Configuration Manager of both node servers, change the account name into the domain account as the following.
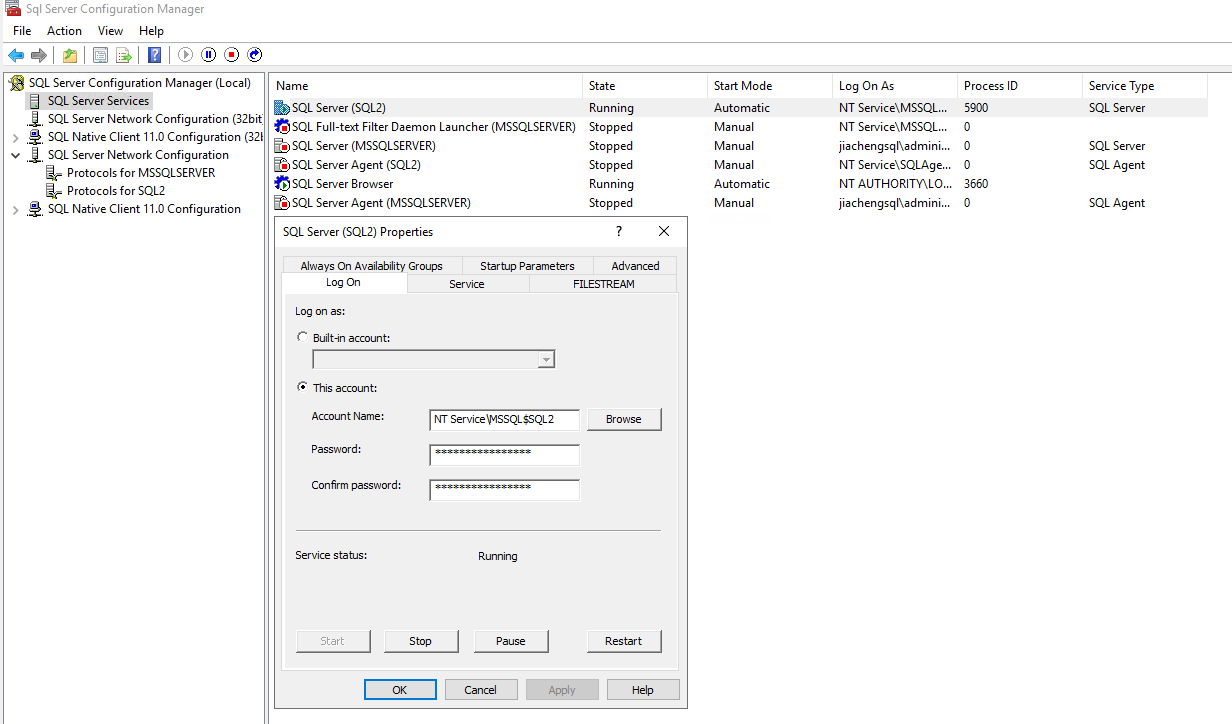
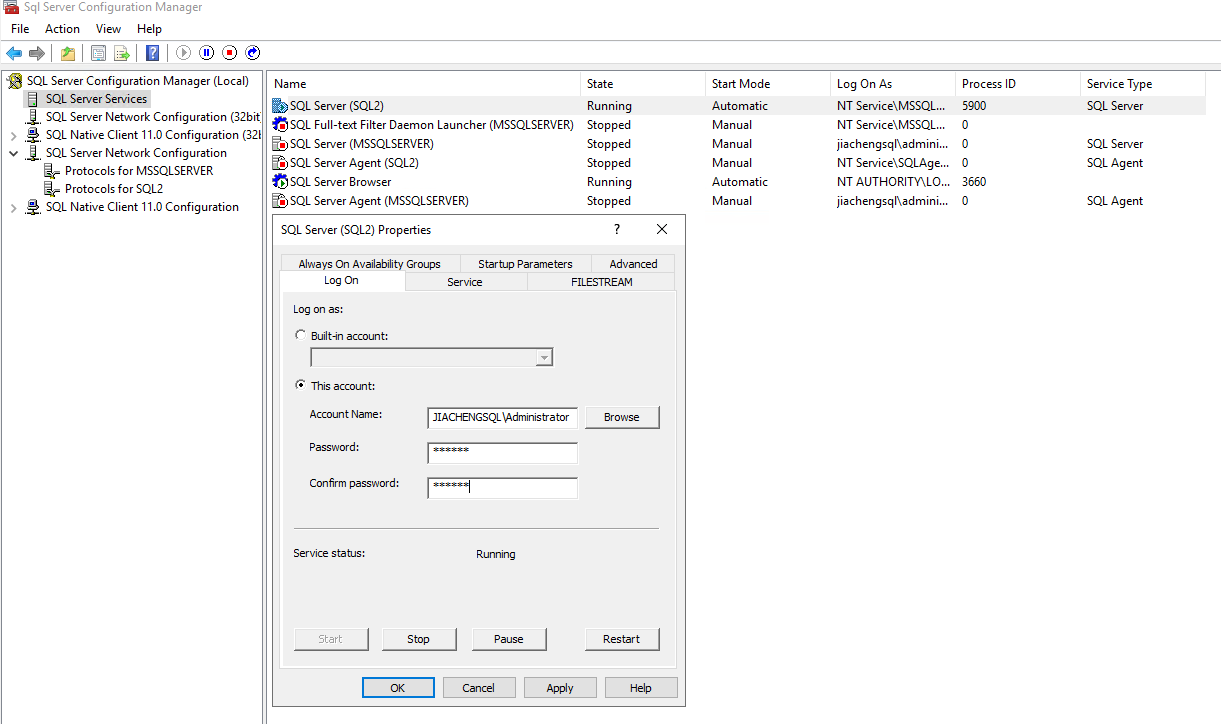
Now, back to the wizard, refresh the page, and the account is successfully changed.
Note that the Port should be 1433 and
the IP Address should be an unused IP Address on the
network.
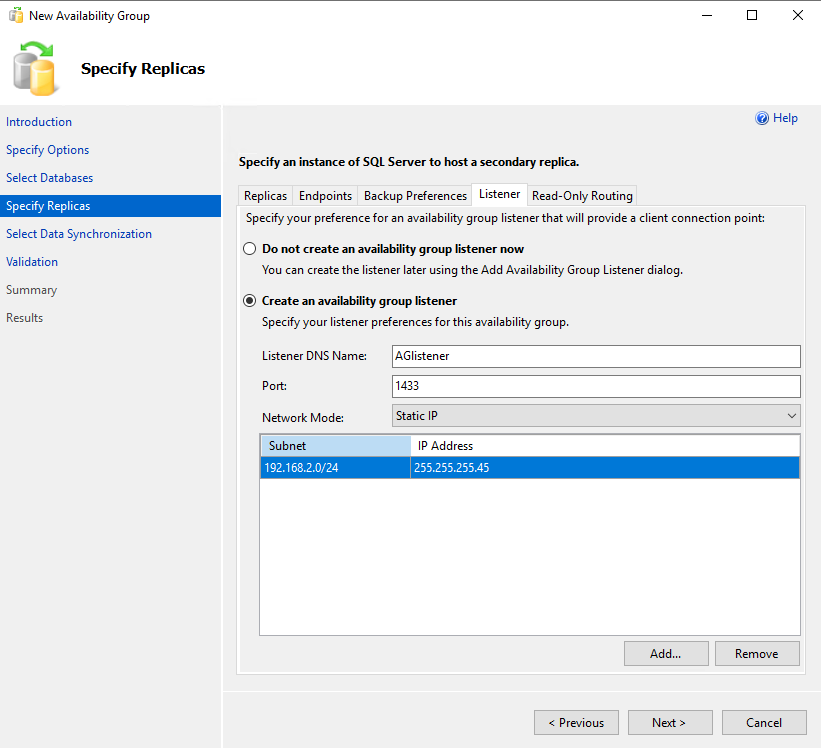
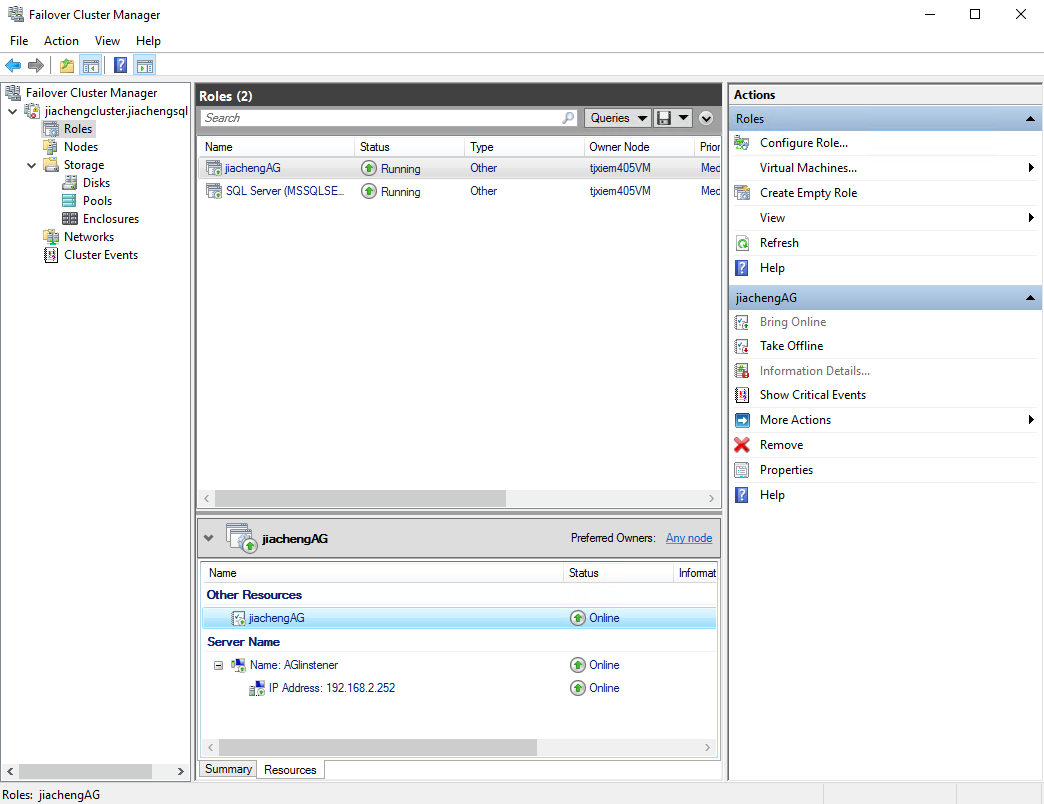
If successfully installed, we can find an AG listener in the Failover Cluster Manager.
Configure Read-Only Route
Configuration
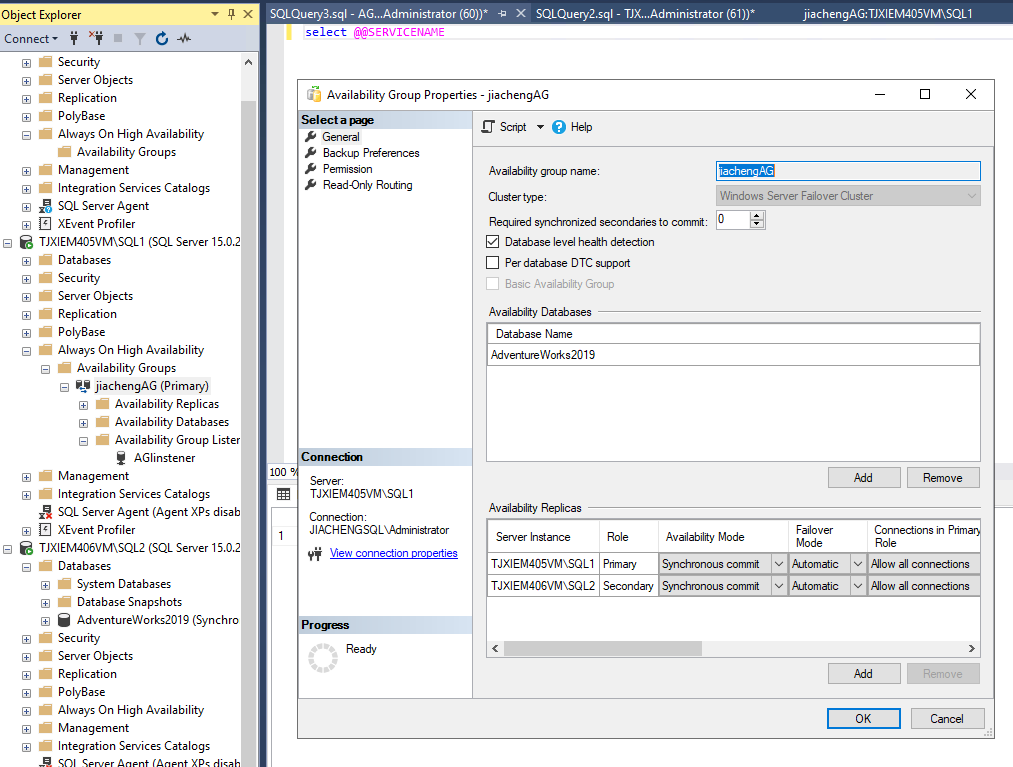
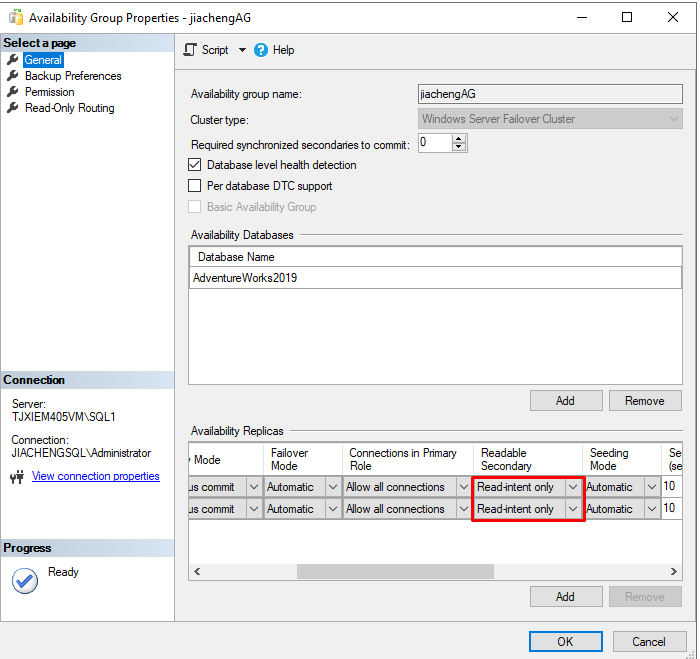
In the Object Explorer, open the
Properties of the AG. Change
Readable Secondary in Availability
Replicas to Read-intent Only.
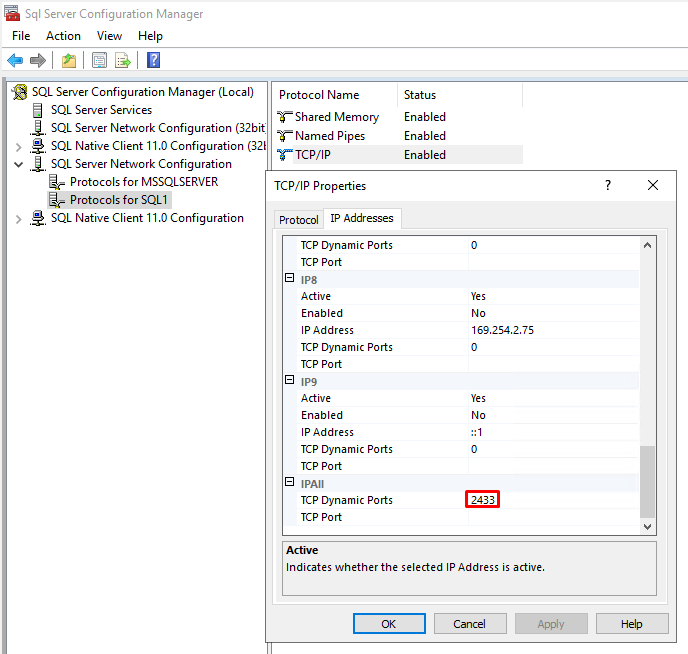
For the two stand-alone SQL servers, in the SQL Server Configuration Manager, Protocols for SQL 1 --> TCP/IP --> Properties --> IP Addresses --> TPC Dynamic Ports, change the port to an unused one for both services. This step ensures we can find the servers using a Read-only routing URL with the same port.
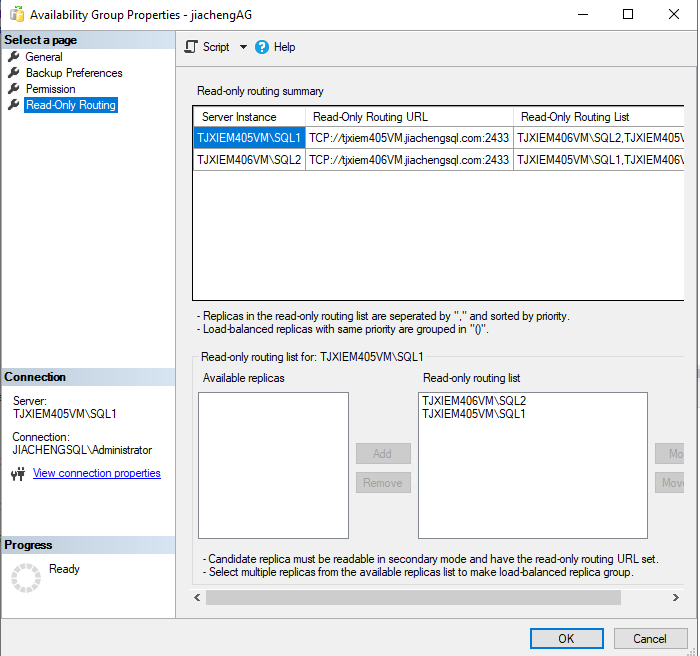
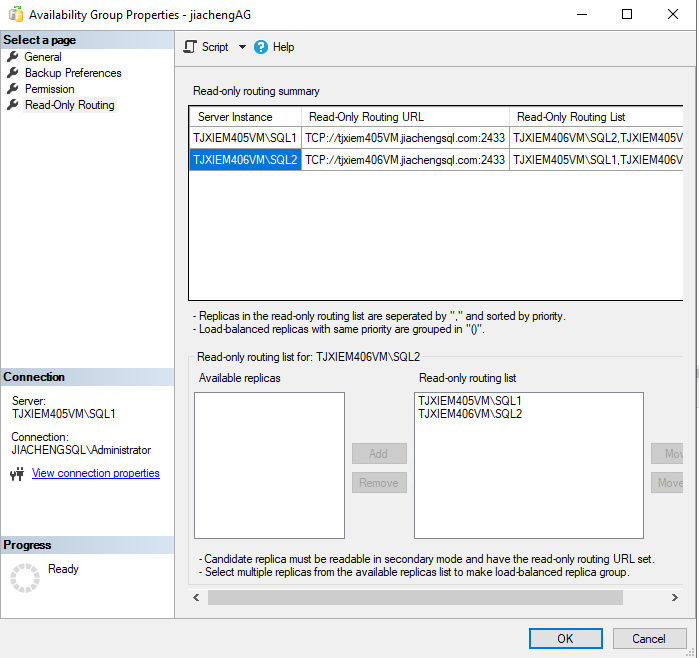
Fill in the Read-Only Routing URL with
TCP://ComputerName.domain:port. The port here
should be the number set in the previous step. Then, click on the first
instance, there will be two available replicas shown, add SQL2 and then
add SQL1. Then, click on the second instance, there will also be two
available replicas shown, add SQL1 and then add SQL2.
Or, simply run the script.
1 | |
Test
Connect the AG listener. Click Options to configure the connection.
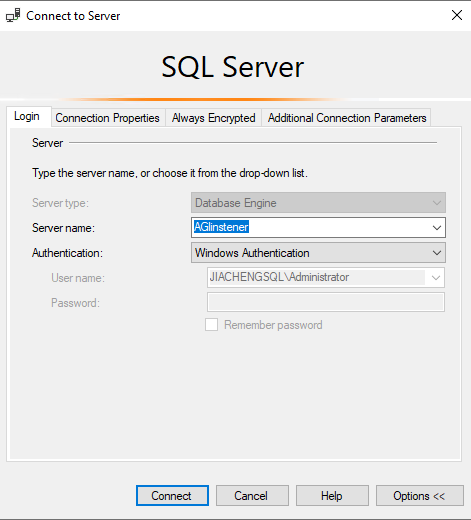
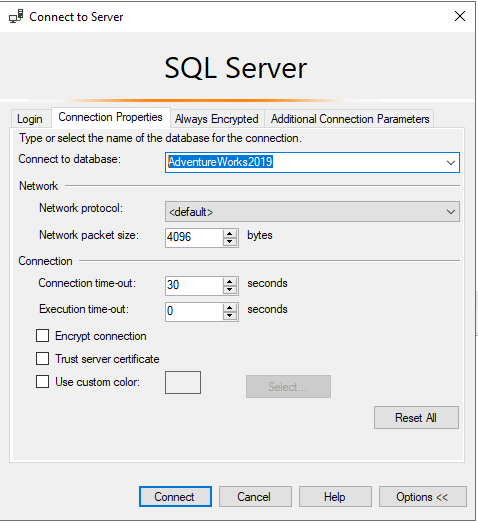
Note that the connected database needs to be specified in
Connection Properties
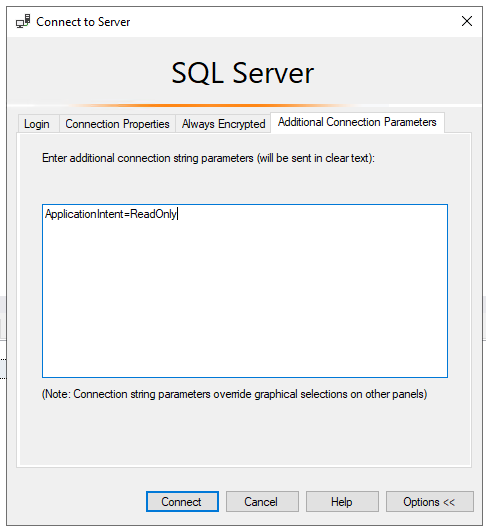
Also, add ApplicationIntent=ReadOnly as connection
strings to enable Read-only routing.
New a query, run the script, the Read-only routing works as I am working in the primary replica while it routes read-only connections to the secondary replica.